
PSE Field Guide — Banner Finishing Shop-Tested
Everything a school needs to finish a banner that stays up: what grommets actually do, how to set them without a heavy-duty press, the corner-plus-18–24-inch spacing rule that survives wind and gym traffic, and which banner material to run for the job.
LAST UPDATED: AUG 2026 // READ TIME: 7 MIN
Quick Answer
Banner grommets are small metal rings set into reinforced holes punched around a banner’s edges so it can be tied, hooked, or bolted to a fence, wall, or frame without the material tearing. Most schools add them after printing with a hand-operated grommet kit — no dedicated grommet press required — spacing them roughly every 18–24 inches with one in each corner, closer together outdoors where wind adds load. The spacing math, material picks, and a no-press install method are all below, or you can shop the grommet kit directly.
What Are Banner Grommets?
Grommets are small metal (or sometimes plastic) rings set into a reinforced hole punched through a banner or heavy poster board. A bare hole punched straight through vinyl or heavy stock will stretch and tear the moment a zip tie or hook puts weight on it. The grommet’s metal ring spreads that load around the entire hole instead of concentrating it on one weak edge — so the banner can be tied down, hung on a fence, or bolted to a frame and survive wind, repeated setup and takedown, and a full outdoor season.
They’re the standard finishing hardware for any banner that gets hung rather than taped or pinned: gym banners, championship banners, outdoor event signage, and CTE or career-vocabulary wall displays all rely on them.
The Pre-Punch Checklist
Five things to confirm before the first hole goes in:
Material matters
Grommet kits are built for vinyl and banner materials — thin poster paper tears around the punch instead of holding a clean ring.
Count your holes first
Plan every grommet location — corners plus edge spacing — before punching a single hole. A 500-grommet kit covers many banners before it runs low.
Indoor vs. outdoor changes the spacing
Wind load is the difference — an outdoor banner needs grommets closer together than the same banner hung inside a gym.
No press? No problem
A hand-operated punch-and-set kit handles school-volume banner runs without a dedicated grommet press.
Check the mounting hardware first
Retractable stands and some indoor displays use a sewn pole pocket instead of grommets — confirm how the banner will actually be mounted before finishing it.
How Do You Put Grommets in a Banner? (No Press Required)
A dedicated grommet press is built for continuous commercial output — most schools never need one. A hand-operated punch-and-set kit, complete with its own punch hardware, finishes a season’s worth of banners in four steps:
STEP 1Mark every location
Mark each corner first, then mark the edge spacing between them before punching anything.
STEP 2Punch the hole
Use the kit’s punch hardware to cut a clean, correctly-sized hole at each mark.
STEP 3Set the grommet
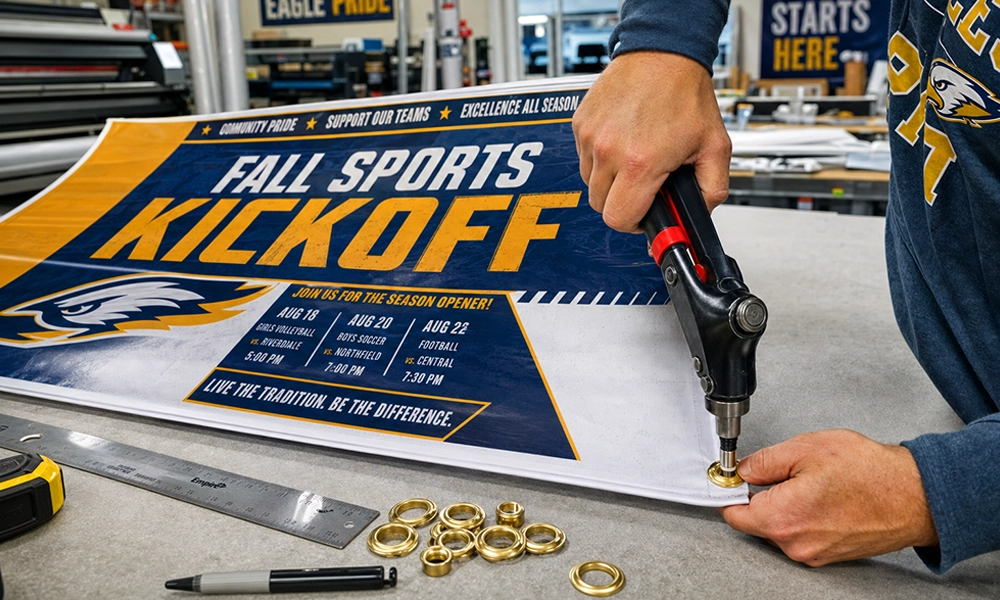
Place the two-piece grommet over the hole and press with the included setting tool until it locks.
STEP 4Check it holds
Tug gently on each grommet before hanging — it should sit flush with no give around the ring.
One Kit, No Separate Press
PSE’s Banner Grommet Kit puts the punch hardware and 500 grommets in one box — built specifically for vinyl and banner materials, so there’s nothing extra to buy before finishing a banner in-house.
- ToolingPunch + setting tool included — no dedicated grommet press needed for school-volume runs
- Quantity500 grommets — enough for many full banner runs before a refill
- Built ForMatched to the material weight of PSE’s banner vinyl and fabric options
How Far Apart Should Banner Grommets Be?
Standard sign-industry practice starts with a grommet in every corner, then fills in along each edge every 18–24 inches. Outdoor banners exposed to wind should stay toward the tighter end of that range — closer spacing spreads gust load across more points, so no single grommet ever takes the full force of the wind pulling on the banner. A banner hung indoors in a gym, where the only load is its own weight and the occasional bump, can generally use the wider end.
Corner grommets first, then evenly spaced along each edge — tighter for outdoor wind exposure, wider for a sheltered indoor gym banner.
Two more rules of thumb worth following: add a grommet at the top center of any banner wider than about 3 feet to stop the middle from sagging, and reinforce any grommet that will carry a bungee cord or zip tie under real tension — a second grommet a few inches away, tied off together, spreads that load further.
Choosing Banner Material for Grommets
Grommets hold best in material with real body to it — here’s what PSE stocks, by weight and use case.
Outdoor Banner Vinyl
24″–60″ widthsWeather-resistant vinyl built for outdoor signage, banners and event promotions. 40-foot rolls, available 24″, 36″, 42″ or 60″ wide (Package A+, Studio-series printers).
Indoor PolyPro Banner
24″–60″ widthsDurable poster-paper-weight banner media for hallway and classroom displays. 100-foot rolls, available in single and 2-pack widths from 24″ up to 60″ (Express & Studio printers).
Lightweight Banner Vinyl
Flex Series onlyNon-curling, quick-drying vinyl for Flex 30 and Flex 64 Poster Printer Cutters, in 30×120′ or 54×120′ rolls. Built to finish with either pole pockets or grommets, whichever the hanging system needs.
Fabric Banner
Flex Series only15-mil, non-PVC polyester with a stable Oxford weave that resists curling — a premium look and feel for retractable banner stands and events. Widths from 20×75′ up to 54×150′.
Banner Material, Compared
| Outdoor Banner Vinyl | Indoor PolyPro Banner | Lightweight Banner Vinyl | Fabric Banner | |
|---|---|---|---|---|
| Printer compatibility | Studio series (Package A+) | Express & Studio | Flex 30 / Flex 64 only | Flex Series only |
| Widths | 24″–60″ | 24″–60″ | 30″ or 54″ | 20″–54″ |
| Built for outdoors | Yes | No — indoor use | Yes | Indoor/event use |
| Grommet-friendly finish | Yes | Yes | Yes, or pole pocket | Usually pole pocket |
| Best for | Gym, stadium & outdoor banners | Hallway & classroom banners | Flex-series sports/event banners | Retractable stands, lobby displays |
Which Setup Fits Your Banner?
Outdoor vinyl + tight grommet spacing
Toward the 18″ end of the spacing range, with a reinforced grommet anywhere a bungee or zip tie will carry real tension.
Indoor PolyPro + standard spacing
Sheltered indoors, so the wider 24″ spacing holds fine — corners plus even edge spacing.
Fabric banner + pole pocket
Retractable stands use a sewn pocket, not grommets — check the hardware before ordering material.
Shop Banner Material & Grommet Kits
Print the banner on a Studio-series machine, then finish it in-house with a grommet kit built for the job — no dedicated press required.
Frequently Asked Questions
What are banner grommets?
Banner grommets are small metal rings set into a reinforced hole punched through a banner's edge. They spread the load around the hole so the banner can be tied, hooked or bolted to a fence, wall or frame without the material tearing under weight or wind.
How do you put grommets in a banner?
Mark every grommet location first (corners, then even edge spacing), punch a clean hole at each mark with a grommet punch, place the two-piece grommet over the hole, and press with the included setting tool until it locks flush. A hand-operated punch-and-set kit handles this without a dedicated grommet press.
How far apart should banner grommets be?
Standard practice is a grommet in every corner, then every 18-24 inches along each edge. Stay toward the tighter 18-inch end for outdoor banners exposed to wind, and the wider 24-inch end for banners hung indoors. Add a top-center grommet on any banner wider than about 3 feet to stop it sagging in the middle.
Can you add grommets without a grommet press?
Yes. A hand-operated grommet kit that includes its own punch hardware and setting tool handles school-volume banner runs without a dedicated commercial grommet press, which is really only necessary for continuous, high-volume production.
What banners come with grommets?
Banner material is typically supplied as roll media that schools print and finish themselves, rather than arriving pre-grommeted. A grommet kit with punch hardware and grommets included lets a school add them in-house after printing, matched to how the banner will actually be hung.
Grommets are simple hardware, but the spacing and the material are what make a banner survive a full season outdoors instead of tearing loose at the first windy Friday night. Plan every hole before punching the first one, match the material to indoor or outdoor use, and finish in-house with a kit built for the job. For more display and hanging ideas, see the legacy recognition banner guide and the CTE vocabulary wall banner guide.
Written by Elena Alvarez, K–8 Library Media & Makerspace Program Director, for Poster Studio Express.
LAST UPDATED: AUG 2026